Integration Flows
There are two approaches to launching the Intellicheck capture experience for a simple, low-code integration:
- Sending a Text to the Applicant. In this scenario, you want the applicant to start the process from a text. You include the
send_linkparameter in the/startendpoint request. - Redirecting the Applicant from an App or Website. In this scenario, you want the applicant to start the process from your app or website. You include the
return_capture_urlparameter in the/startendpoint request.
In both cases, you make a single API call to the/startendpoint.
Sending a Text to the Applicant
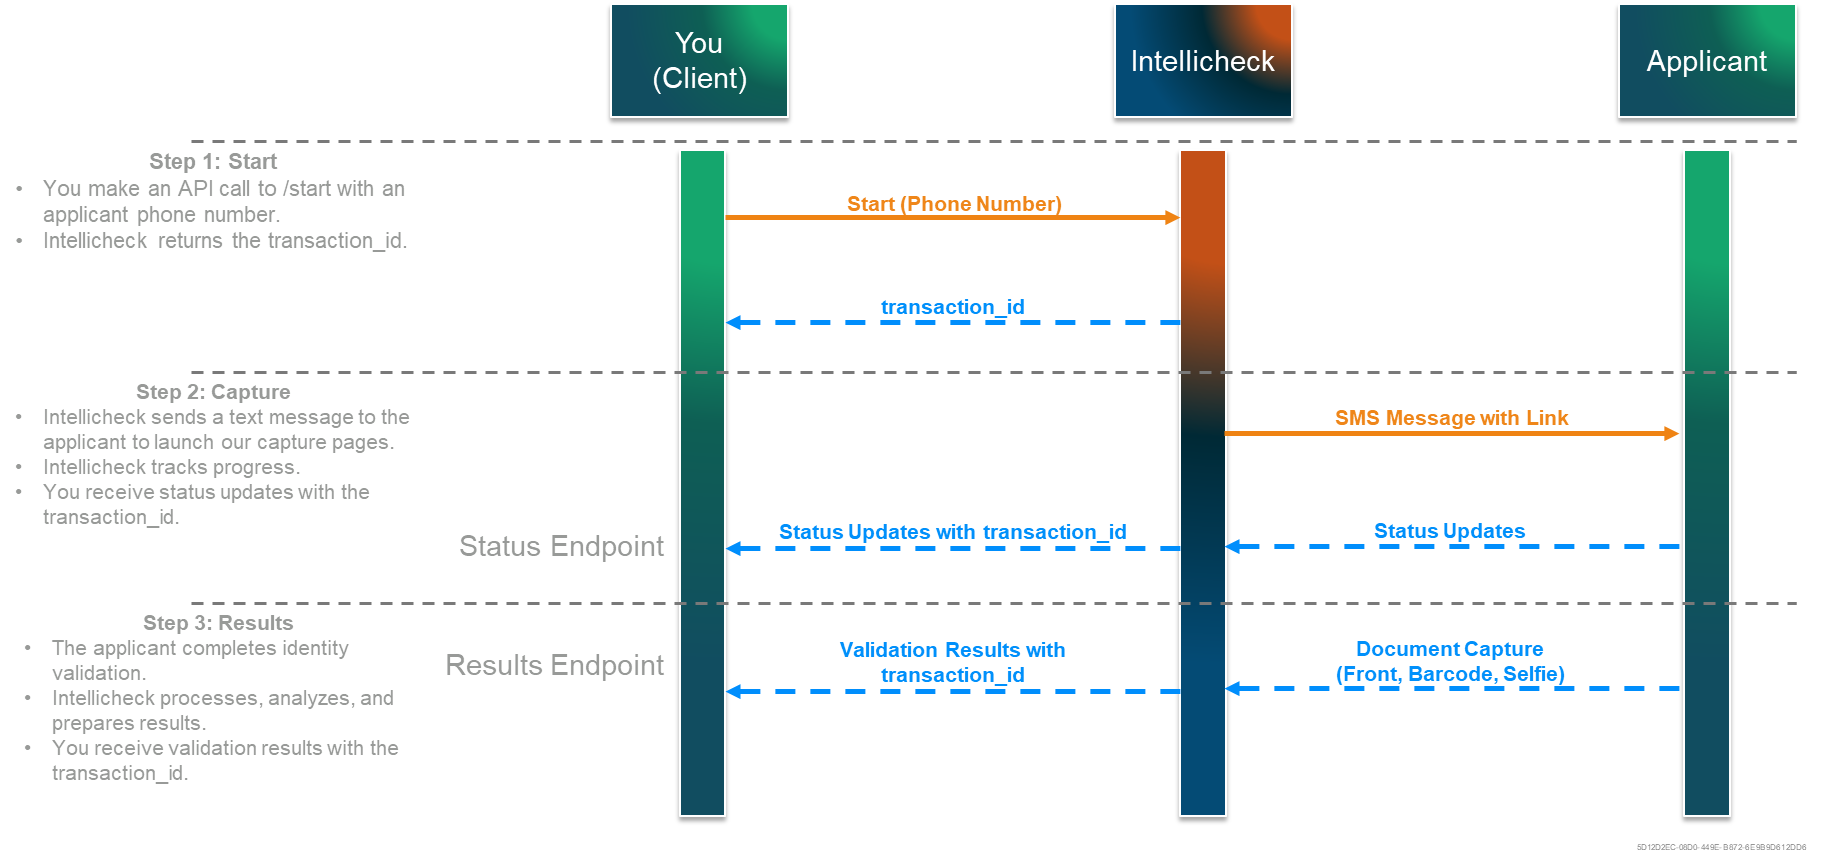
In this scenario, the applicant receives a text. The text includes a link that takes the applicant to our capture pages. After the applicant completes the capture steps, Intellicheck posts the processed results back to the client.

Here's a rundown of end-to-end validation that starts with a text:
- The client makes a
/sartAPI call that includes thesend_linkparameter with the applicant phone number. - Intellicheck returns a
transaction_idfor the transaction in the response. - Intellicheck sends a text to the applicant. The message body includes a unique URL for the applicant’s verification session.
- The applicant selects the link to launch our capture pages.
- The applicant completes the capture process, for example, by taking a picture of the front of the document (
ocr_scan), scanning the barcode on the back (idcheck), and optionally taking a selfie (selfie). - Intellicheck processes the captured ID elements and posts the validation results back to the client results endpoint with the
transaction_id. - Optionally, the client can provide a status endpoint for Intellicheck to post user journey updates to monitor the applicant’s state through the capture pages. This post back includes the
transaction_idand indicates actions the applicant has taken during the capture process.
Document Type Descriptions explains the types of documents we validate. Signal Descriptions describes the validation checks we perform.
Redirecting the Applicant from an App or Website
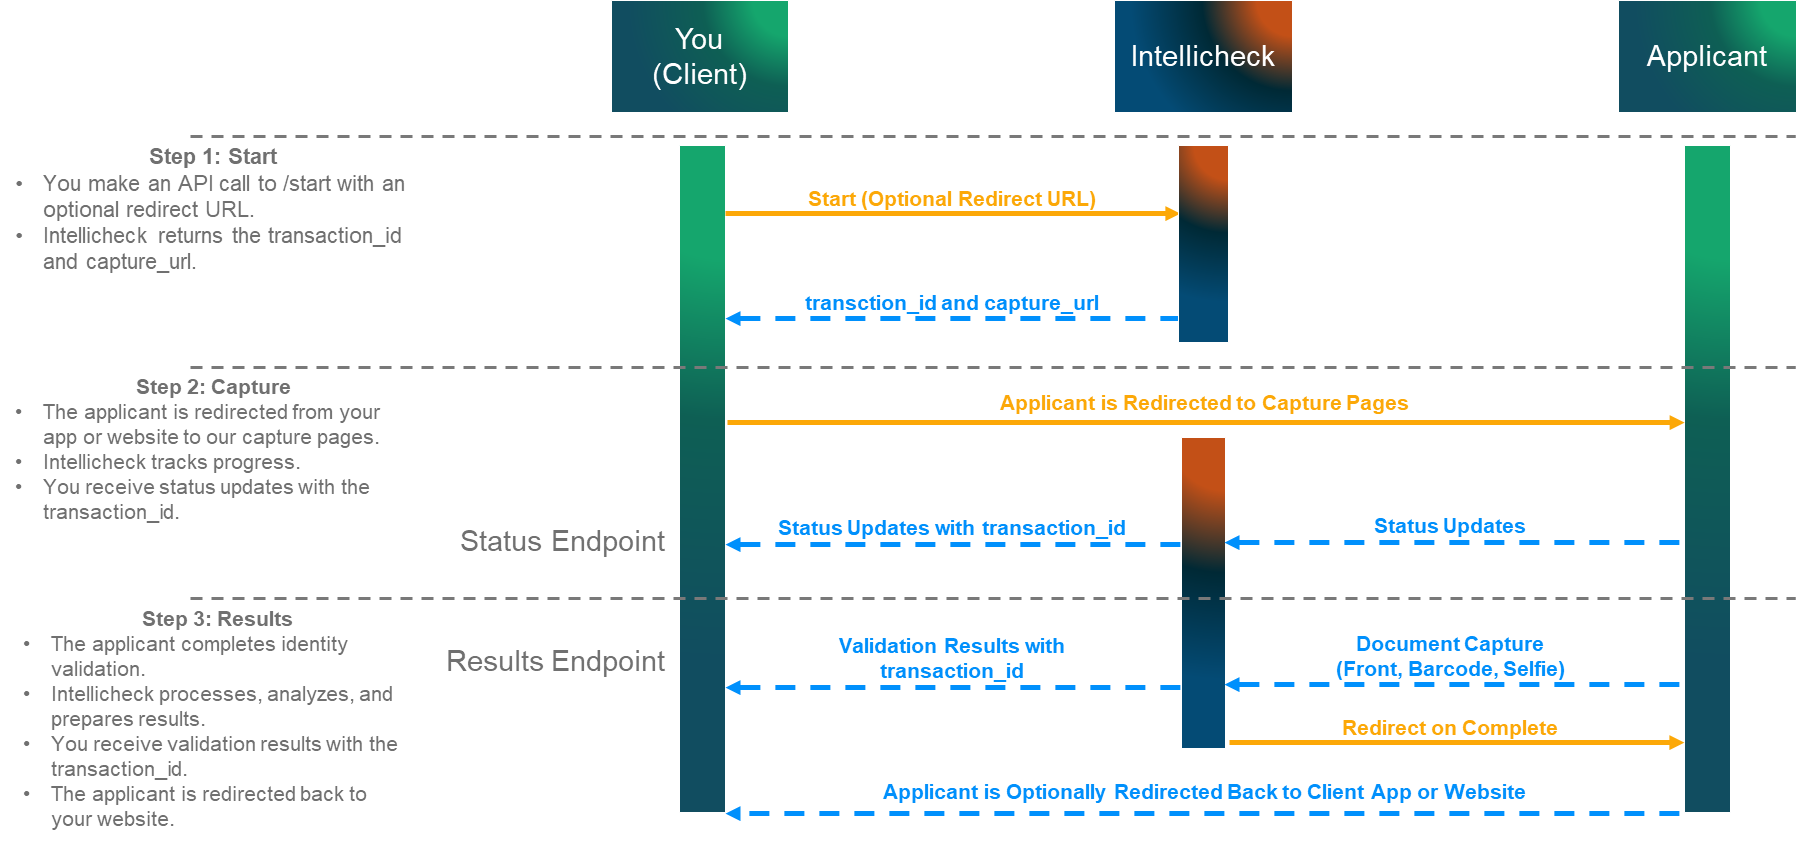
In this scenario, the applicant is redirected from the client app or website to Intellicheck capture pages. There is no text. We detect the applicant's browser type. If it's a PC browser, then we give the applicant a QR code to scan with their phone. If it's a mobile browser, then we skip the QR code and take the applicant directly to our capture pages. Either way, the process starts with a browser redirect. After the applicant completes the capture steps, Intellicheck posts the processed results back to the client.

Here's a rundown of end-to-end validation that starts with a redirect:
- The client makes a
/startAPI call that includes a truereturn_capture_urlboolean value and an optionalredirect_urlto handle the following:- Redirect the applicant browser from the final capture step back to the client website or app.
- Intellicheck returns a
transaction_idfor the transaction in the response. - Intellicheck returns the
capture_url, which is a unique URL for the capture session. - The applicant browser is redirected to our capture pages.
- The applicant completes the capture process, for example, by taking a picture of the front of the document (
ocr_scan), scanning the barcode on the back (idcheck), and optionally taking a selfie (selfie). - Intellicheck processes the captured ID elements and posts the validation results back to the client results endpoint with the
transaction_id. - Optionally, the client can provide a status endpoint for Intellicheck to post user journey updates to monitor the applicant’s state through the capture pages. This post back includes the
transaction_idand indicates actions the applicant has taken during the capture process. - Upon completion of the steps, the applicant is redirected back to the client website or app.
Updated 9 months ago
